
Join 1,000,000+ Entrepreneurs like you
Entrepreneurship is booming – and we're happy to be one of America's fastest growing companies.
Your keys to the online world of new customers
The digital world – this is where things happen. Just about every business has a website, and most have made social media a top priority over the last decade as customers flock to new digital content. Maintaining a current website and a strong presence on social media platforms enables you to reach your customers where they are, and gives your customers the ability to reach you, too. By extending your brand through your website, email address and social media accounts, you create a consistency that is easy for your customers and prospects to follow.
An important first step is securing your domain name so that your website and email address identify your business to the market.
Securing Your Domain & Business Email Address
Want to increase credibility with your audience? One of the most common ways is to send business emails from an “@yourcompany.com” address. This shows that you’ve dedicated the time to present your business formally instead of slapping components together and sticking a cardboard sign out front.
We provide you with an easy way to claim your business domain and create a familiar “yourname@yourbusiness.com” address. You’ll be able to use this address to send professional emails and set up your social accounts as well.
Recipient Receives
Branded Email that promotes your company with every email sent
Calendar, Contacts and Tasks that allow you to track your appointments and access your business contacts from any device
Cloud File Storage so you can store and access your files from any device
Next, we’ll walk through the setup of four different social media platforms – Facebook, Instagram, Twitter and LinkedIn – so that you can begin building trust with new customers through online content
Facebook is a great place to post everyday content focused around your business. Hours of operation, customer reviews and special sales events are commonly searched for, and you can engage directly with customers as they request information from you. Plus, you can showcase photos and video of your products and services in action to boost interest.
Here’s how to set up a Facebook Page for your business:
01
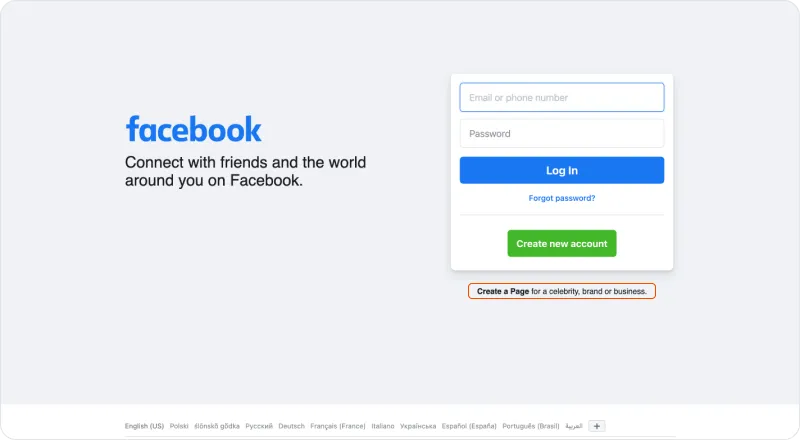
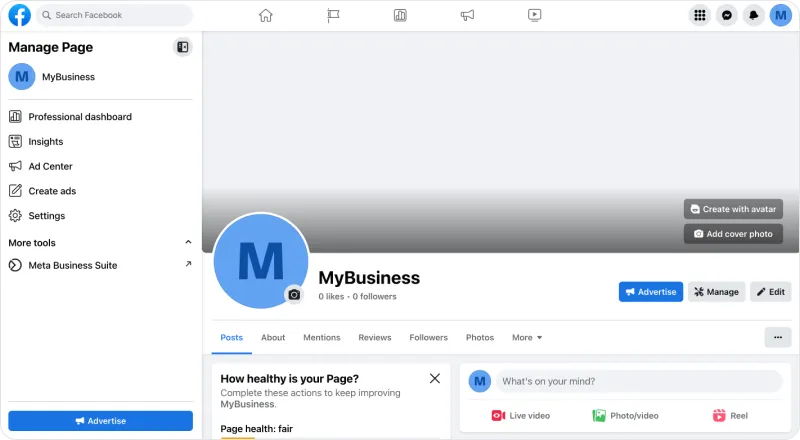
First, visit Facebook. Below the big green “Sign up” button is “Create a Page” That’s what you’ll want to click on. On mobile, you’ll tap the menu icon (or, “hamburger”, as some like to call it), and then Pages. You can also access this page directly.
02
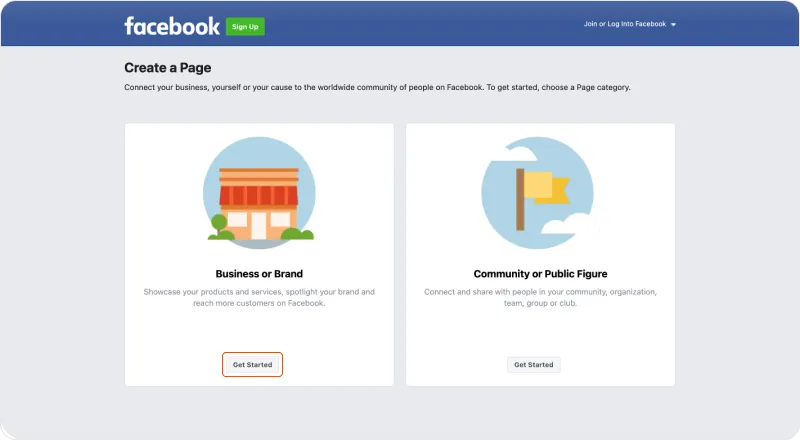
Here, you can choose what kind of page you want to create: “Business or Brand”. or “Community or Public Figure”. Once you choose and click on “Get started”, you’ll have to sign in, or you can create a new Facebook account if you don’t have one.
03
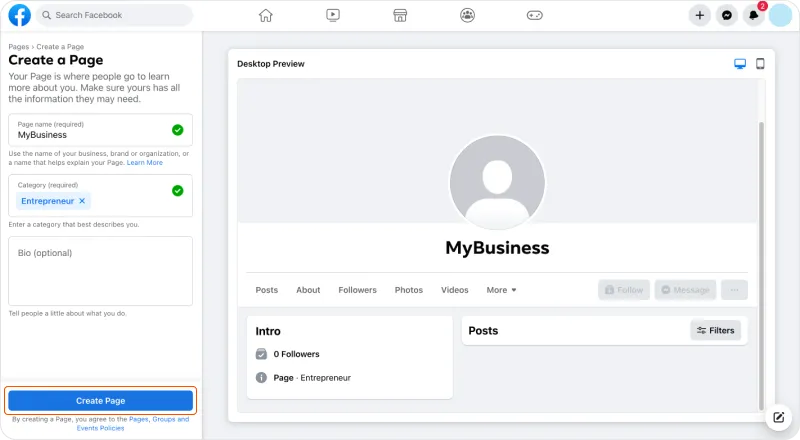
Once you’ve logged in, you can enter your page name, category, and bio. After you’re finished, tap or click Create Page to continue to your new page.
04
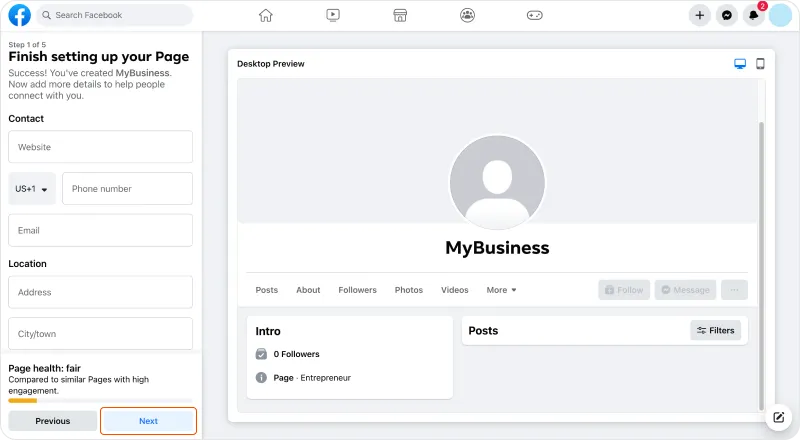
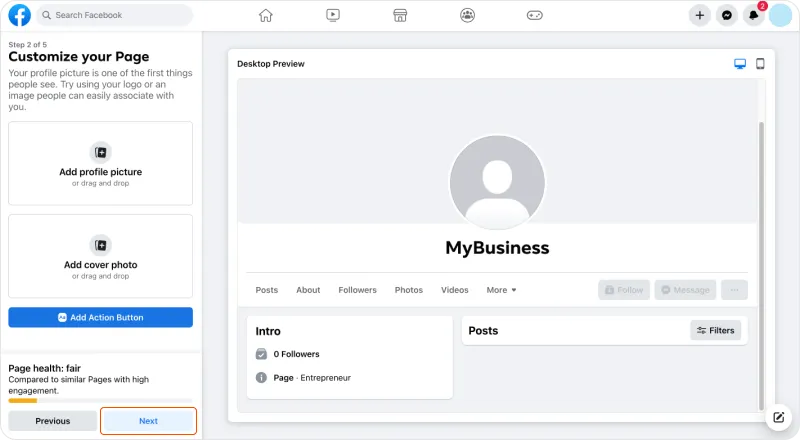
Next, Finish setting up your page with more information such as your contact (website url, phone, and email) and location information. If you want to Customize your page, you can do so by adding a profile picture and cover photo, when prompted on the next screen.
05
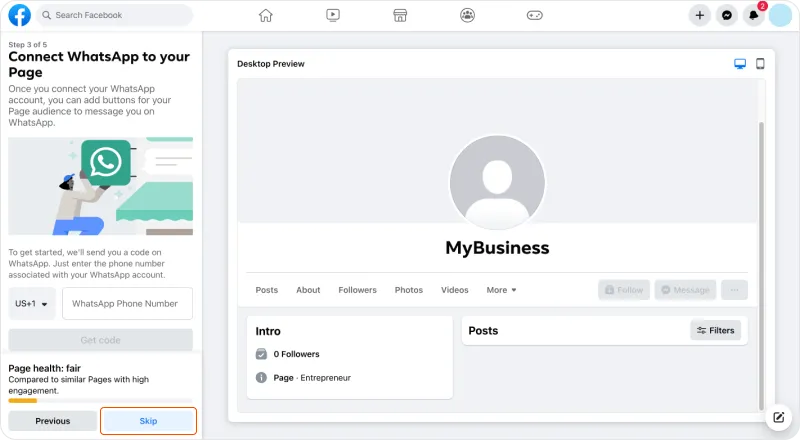
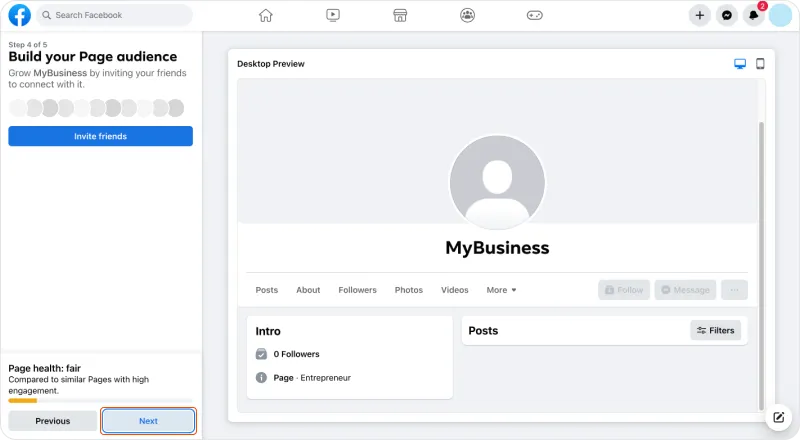
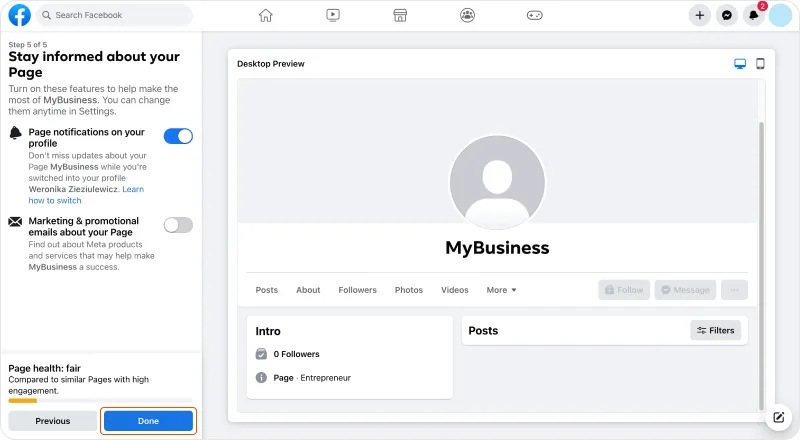
Connect, Grow, and Manage. Once your page is complete, you have the options in the final pages to Connect WhatsApp to Your Page, invite friends to Build Your Audience, Stay Informed About Your Page (set alerts), and Manage Your Page if any changes need to be made in the future.
Instagram is one of the most popular platforms today, mainly because it’s all about photos and video. Hashtags are used to tag media so that other users can easily find content that appeals to them and have that content displayed on their feed. As a business, you can utilize hashtags to get your products and services in front of more people and begin growing your very own online following with quality content.
Here’s how to set up an Instagram account for your business:
01
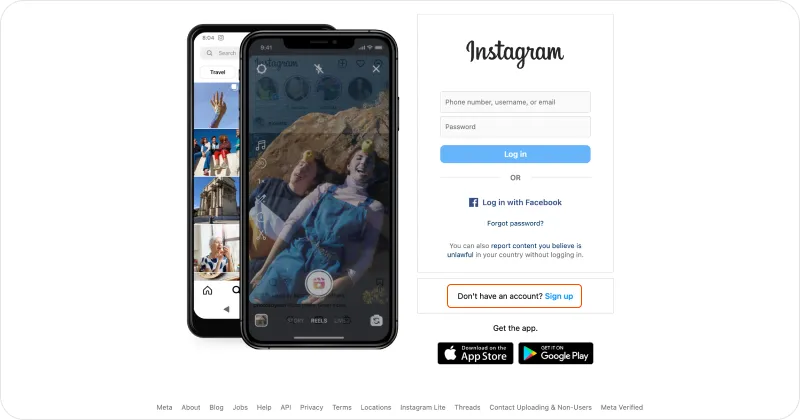
First, visit Instagram. Tap or click Sign up to get started (or Log in if you already have an account or conversely, want to use an existing Facebook login).
02
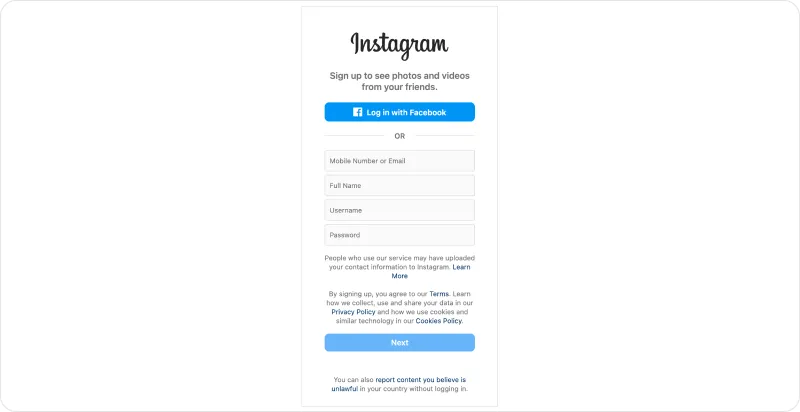
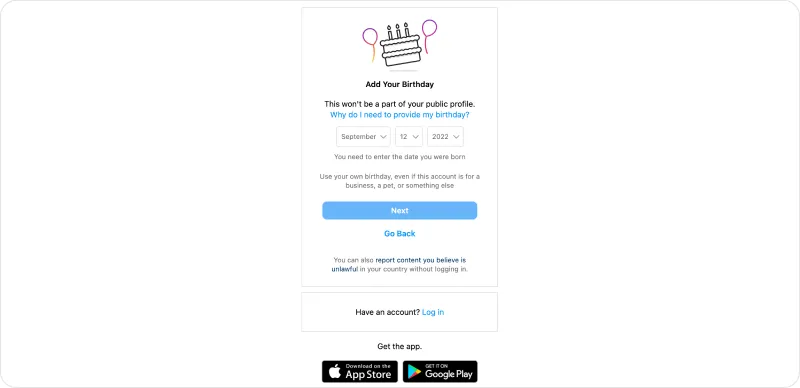
On the first screen (if you do not have an existing account or choose not to sign in with Facebook), you’ll need to enter your mobile number or email, your first and last name, and a user name and password. Click Next. The second screen will ask for your date of birth. Add it and click Next to bring you the email confirmation screen. Here, you will add the confirmation sent to either your email or mobile phone number (depending on which you chose).

03
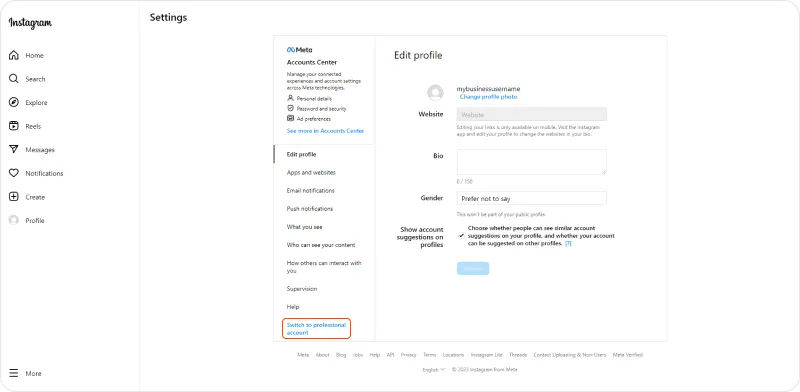
Once your personal account is confirmed, you can tap or click on your profile icon to add a profile photo and some information about your company. To start creating your business profile, go to Settings and tap or click Switch to professional account.
04
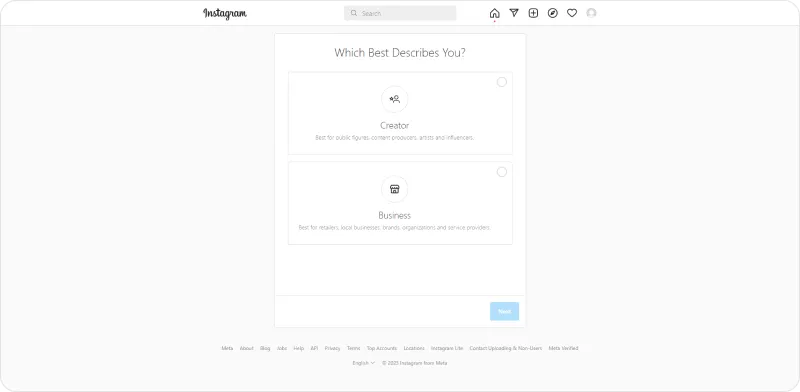
You’ll be taken to a page asking more about the business you want to create a profile for. First off, Which Best Describes You? You can choose Creator or Business. Select Business by tapping or clicking on the Business box.
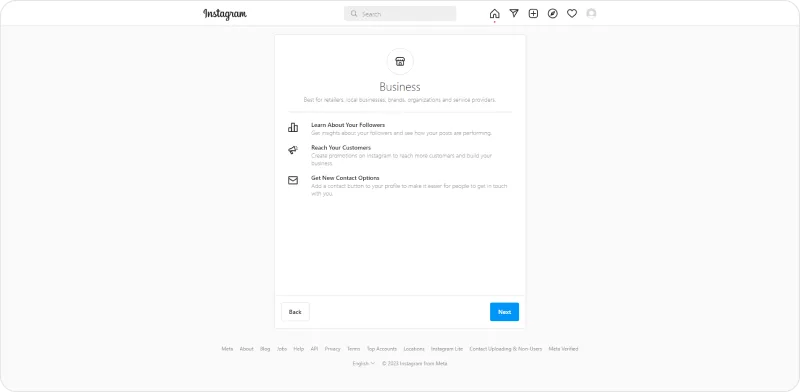
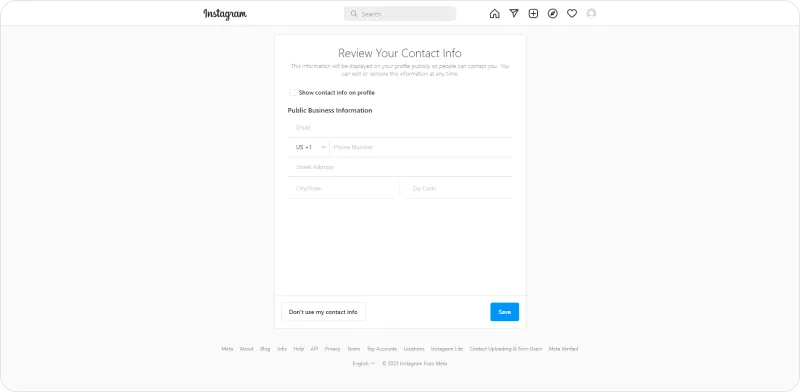
05
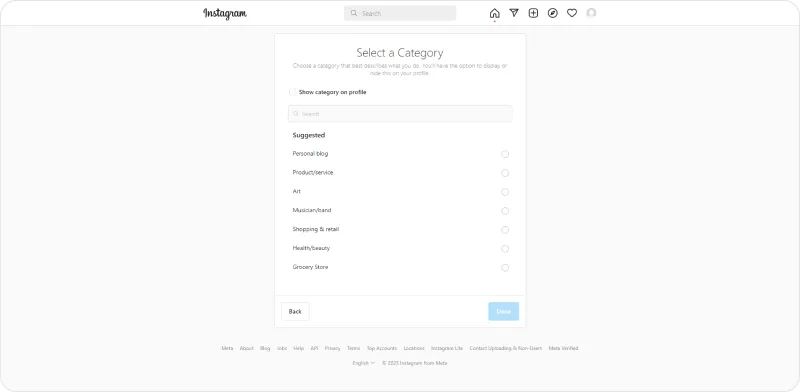
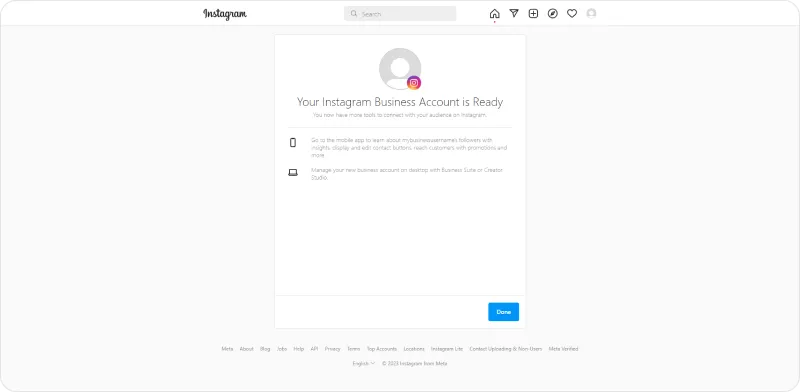
Click Next after choosing business, and again, after reviewing the business page description.The next page will allow you to Select a Category for your business. Once selected from the dropdown, click Next. Lastly, Review Your Contact Info and once complete, hit Next. Your business account profile is complete!
X (Formerly Twitter)
X is intended for shorter posts that can feature photos or video to introduce new ideas, share relevant content, and it allows direct communication between businesses and their customers. You can begin by following relevant companies or public figures who relate to what your business provides and grow your following by posting regularly (often multiple posts per day).
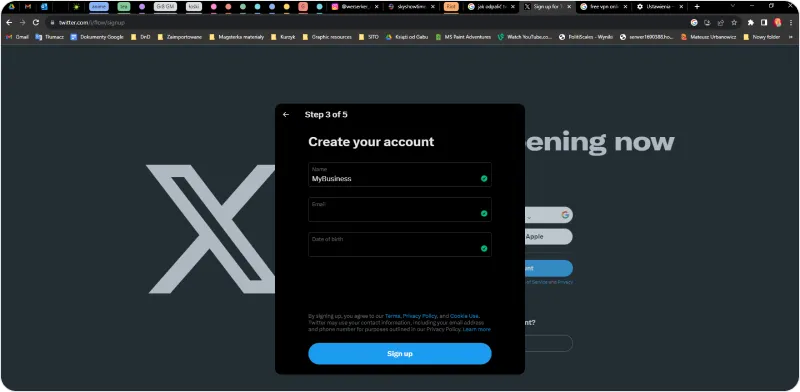
Here’s how to set up an X account for your business:
01
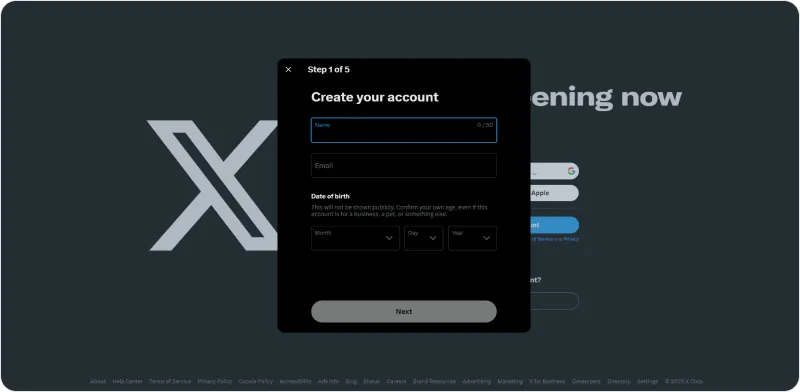
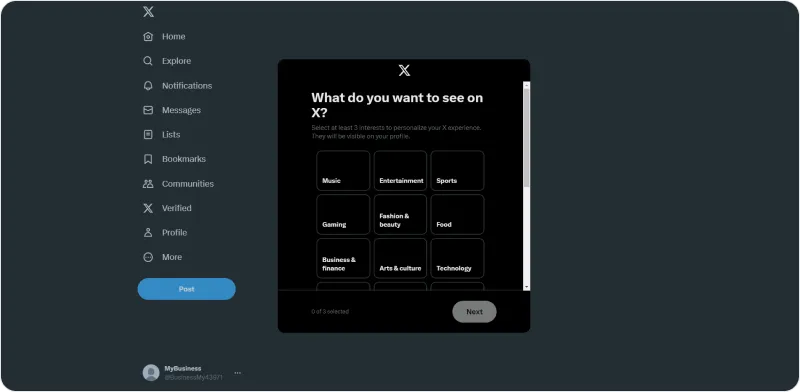
First, visit X/Twitter. Tap or click Sign up with Apple or Google or Create an Account and you’ll be prompted to input your information.

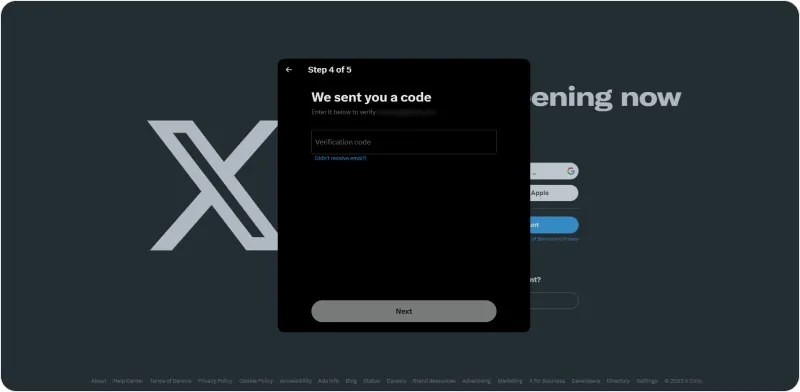
02
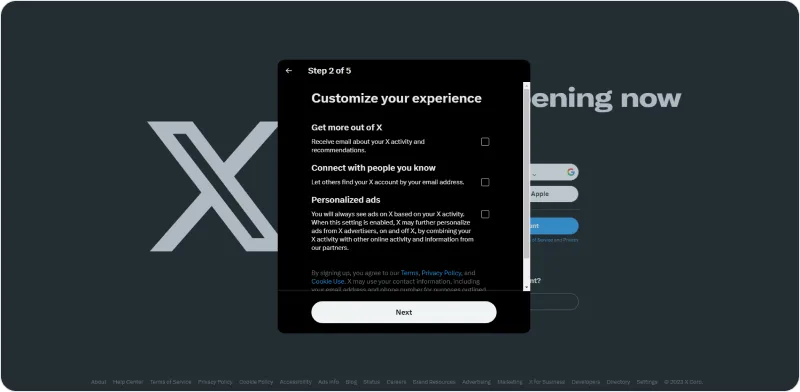
Next, you’ll be given the opportunity to Customize Your Experience by clicking applicable boxes for notifications, connections, and ads. Once complete, click Next.
03
Next, you’ll be given the opportunity to Customize Your Experience by clicking applicable boxes for notifications, connections, and ads. Once complete, click Next.
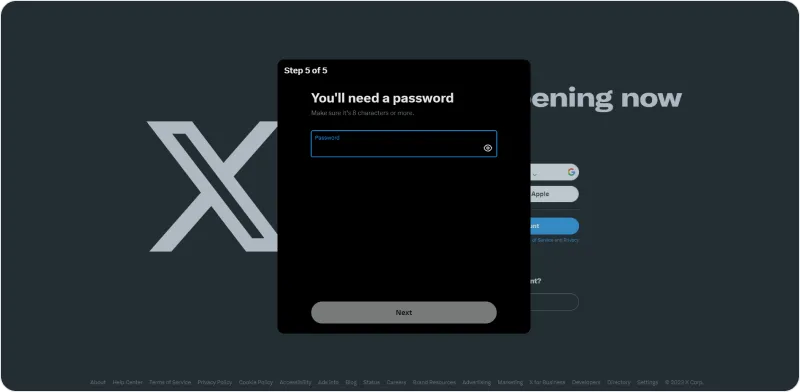
04
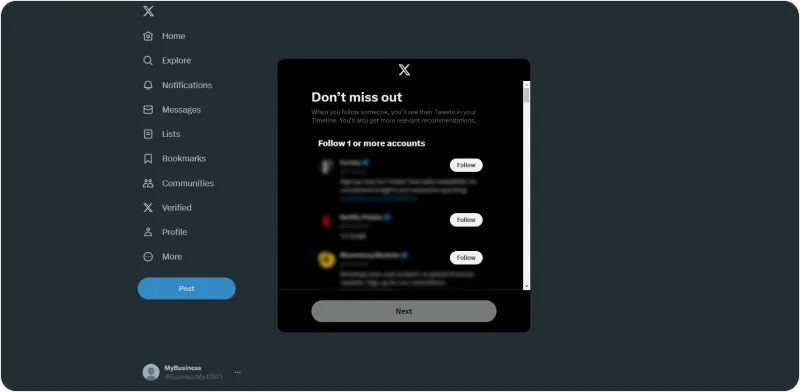
The subsequent pages will allow you to customize your account profile. You can Pick a profile picture, determine your user name, choose interests and specific accounts to follow. Make your selections on these pages, and click Next.

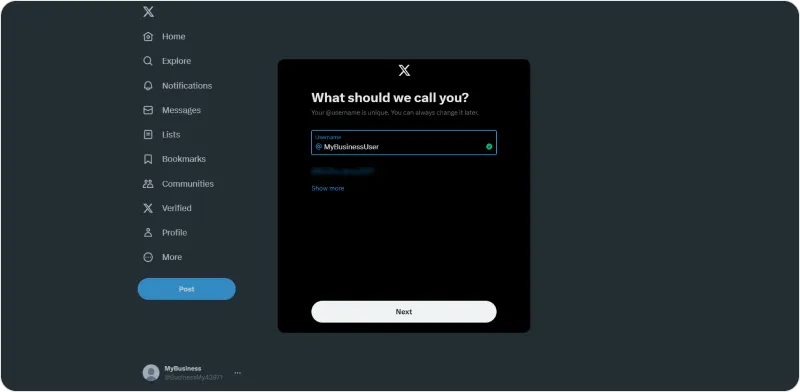
05
Inside your profile, you can tap or click Edit profile to add a photo of your logo, set a cover photo image, announce location, and change settings. Once selected, click or tap Save. The only thing left to do is to start tweeting quality content that engages your target audience.


LinkedIn is a must for the savvy entrepreneur looking to make connections. This is a space to showcase your company’s professionalism, knowledge, and expertise with regards to your products and services. It’s a place for you to connect with others in your industry and build strong relationships that can benefit you down the road. Generally, LinkedIn posts should be light and informative, providing readers with new knowledge and creative business concepts.
Here’s how to set up a LinkedIn company page for your business:
01
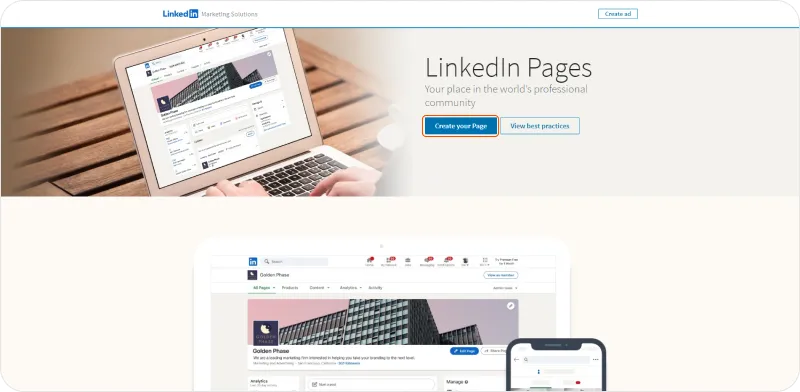
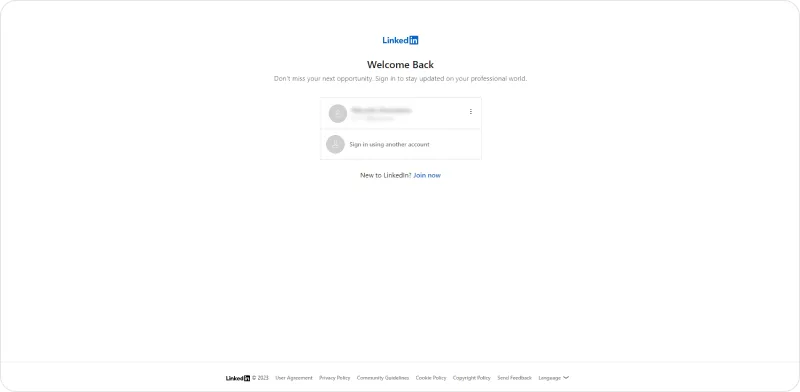
First, visit LinkedIn. This will have to be done on a desktop, as LinkedIn doesn’t offer the ability to create business pages on mobile. To start, click or tap Create your Page and Sign in (or Join Now if you do not have an existing account).
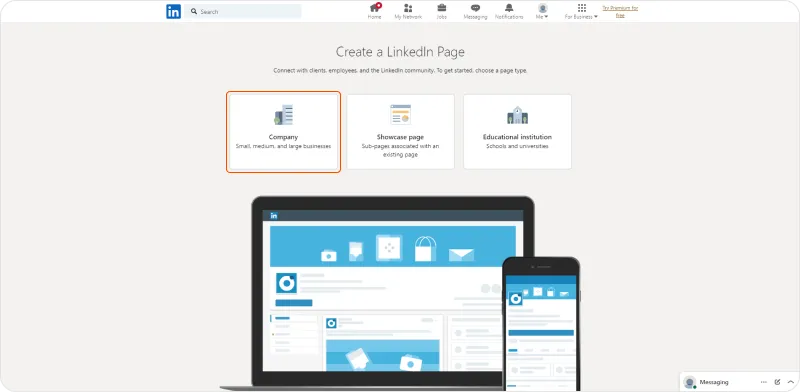
02
Once logged in, you’ll be prompted to Create a LinkedIn Page by first selecting Company, Showcase Page, or Educational Institution. Select Company for your business.
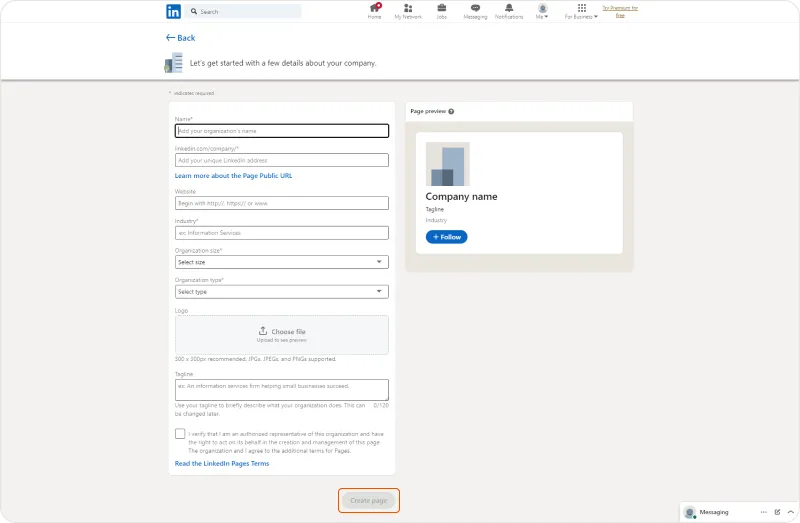
03
The following page is where you will be able to enter more details about your business, information such as the name of your business, organizational size, website url, what you want your LinkedIn url to be, logo, tagline, etc. Add your data and you’re done!
04
There you go — your business is now represented with its own LinkedIn company page that users can access to see your activity and find information about what your business does.
Once you have each of your social accounts secured with your new business name, you can link to them on your business website so that customers have easy access to your content. Creating these accounts serves as a big addition to your brand that will pay dividends as you grow your business and nurture your online reputation. Complete that, and we can move on to Chapter 4!